
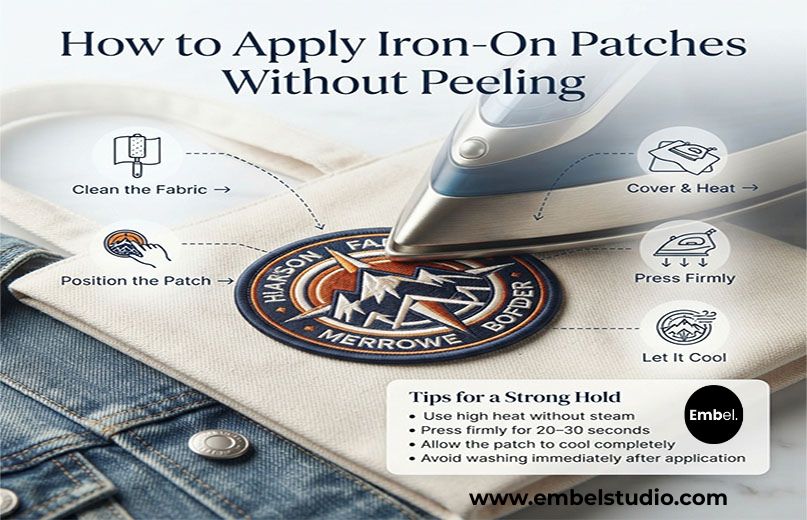
How to Apply Iron On Patches Without Peeling
You finally got the patch you wanted. Maybe it’s for a jacket, maybe it’s fixing a hole in your kid’s backpack, doesn’t matter. You iron it on, feel pretty proud of yourself, and then a week later there’s a corner lifting up like it’s trying to escape. If that’s happened to you, it’s not really your fault, and it’s definitely not a sign you’re bad at this. Ironing on a patch looks simple, but there are a handful of small things that make the difference between “stuck for years” and “peeling after one wash.” Let’s go through what actually works.
Why Iron-On Patches Peel in the First Place
Before fixing the problem, it helps to know why it happens. It’s almost never one big mistake, it’s usually a combination of a few small things.
Not Enough Heat, or Uneven Heat
The adhesive on the back of an iron-on patch needs a specific amount of sustained heat to properly melt and bond with the fabric. If your iron isn’t hot enough, or you’re moving it around too quickly instead of holding steady pressure, parts of the patch never actually bond. Those spots are exactly where peeling starts.
Rushing the Process
This is probably the most common one. People iron for five seconds, check if it’s stuck, and move on. The adhesive needs real time under heat and pressure, usually closer to 20-30 seconds per section, not a quick pass.
Wrong Fabric Type
Some fabrics just don’t play nice with iron-on adhesive. Nylon, certain waterproof or technical fabrics, and some synthetic blends either don’t hold heat evenly or risk melting before the adhesive fully bonds. If you’ve applied a patch perfectly and it’s still lifting, the fabric itself might be the actual issue.
Washing Too Soon
Even a perfectly applied patch needs time to fully cure. Tossing the item in the wash the same day, especially in warm water, can undo a bond that hasn’t finished setting.
How to Apply an Iron-On Patch the Right Way
Step One: Prep the Fabric
Wash and dry the garment first if it’s new, since fabric softeners and manufacturing residue can interfere with adhesion. Lay the item on a flat, hard surface, an ironing board works, but a table with a thin towel underneath works just as well.
Step Two: Position Before You Commit
This sounds obvious, but it’s the step people skip. Place the patch exactly where you want it, step back, look at it from a normal viewing distance, and make sure it’s actually straight and centered. Once you apply heat, you don’t get a do-over without risking damage to the patch or fabric.
Step Three: Preheat the Area
Run the iron over the spot where the patch will go for a few seconds before placing it down. This removes any moisture and gets the fabric itself warm, which helps the adhesive bond more evenly once the patch goes on.
Step Four: Use a Pressing Cloth
Put a thin cotton cloth, a plain pillowcase works fine, over the patch before ironing directly on it. This protects the design from scorching and helps distribute heat more evenly across the surface.
Step Five: Apply Firm, Steady Pressure
Set your iron to a high heat setting appropriate for the fabric (check the care label if you’re unsure), and press down firmly without sliding it around. Hold it in place for 20 to 30 seconds, then lift, reposition slightly if the patch is large, and repeat until you’ve covered the entire surface, including the edges specifically.
Step Six: Focus Extra Attention on the Edges
Corners and edges are where peeling almost always starts, so don’t rush past them. Go back over just the border of the patch for a few extra seconds each side after you’ve done the main pressing.
Step Seven: Let It Cool Completely
Once you’re done ironing, leave the item flat and undisturbed for at least a few minutes. Moving or folding the fabric while the adhesive is still warm and soft is one of the easiest ways to shift the patch or weaken the bond before it’s had a chance to set.
Should You Sew It Too?
Why a Few Stitches Make a Big Difference
Here’s a bit of a secret: even a perfectly applied iron-on patch benefits from a simple stitch around the edge afterward. It doesn’t need to be fancy, a basic whip stitch or even a few securing stitches at the corners adds a mechanical hold that heat alone can’t match, especially for anything that’s going to be worn and washed regularly.
When It’s Worth the Extra Effort
If the patch is going on something decorative that won’t see much wear, skip it, the iron-on bond alone is probably fine. But for jackets, backpacks, or anything that gets tossed around daily, that extra five minutes of stitching is honestly the difference between a patch that lasts a season and one that lasts for years. Order Now
What to Do If a Patch Already Started Peeling
Re-Ironing Might Fix It
If you catch it early, before the lifted section gets dirty or frayed, you can often just place the pressing cloth back over it and reapply heat and pressure to the peeling section specifically. This sometimes reactivates enough adhesive to reseal it.
When It’s Time to Just Sew It Down
If re-ironing doesn’t hold, or the patch has already lifted in multiple spots, it’s usually faster to just sew around the whole thing rather than fighting with the adhesive further. A patch that’s half-heartedly reheated over and over tends to look worse over time, not better.
Getting a Patch That’s Actually Built to Last
A lot of peeling issues honestly come down to the patch itself, not just how it’s applied. Cheaper, mass-produced patches sometimes use thinner adhesive backing that just doesn’t hold up as well, no matter how carefully you iron it on. This is where it helps to work with a company that actually specializes in patches rather than treating them as an afterthought. Embel Studio Patches is one example, they focus specifically on custom embroidered and personalized clothing patches, which tends to mean more consistent backing quality and better stitching around the edges, the exact areas that cause peeling in the first place. If you’ve followed all the application steps and you’re still fighting with patches that won’t stay put, it might genuinely be worth starting with a better-made patch instead of blaming your ironing technique.
Frequently Asked Questions
How long should I iron a patch on for it to stick properly?
Most patches need 20 to 30 seconds of firm, steady pressure per section, including extra time specifically on the edges, rather than one quick pass with the iron.
Can I fix a patch that’s already peeling without removing it completely?
Often yes, placing a pressing cloth back over the lifted area and reapplying heat and pressure can reseal a peeling edge, though sewing it down is a more permanent fix if it keeps happening.
Is it better to sew or iron a patch on?
Ironing is faster and works fine for lighter use, but sewing, or doing both together, holds up significantly better for anything that gets washed or worn often.
Why won’t my patch stick to certain jackets?
Some fabrics, particularly nylon, waterproof, or heavily coated materials, don’t hold heat evenly or bond well with iron-on adhesive, so sewing is usually a better option for these fabric types.
Final Thoughts
Getting an iron-on patch to actually stay put isn’t complicated, it just requires a little more patience than most people expect going in. Prep the fabric, take your time with the heat, don’t skip the edges, and let it cool before you touch it again. And if you keep running into peeling despite doing everything right, it might just be time to try a better-made patch from somewhere like Embel Studio Patches instead of blaming your iron. A little extra care at both the patch-buying stage and the application stage is really all it takes to get something that lasts.




Leave a Comment