
Iron On vs Ironable Patches: What’s the Difference?
You’re staring at two product listings. One says iron on patches. The other says ironable patches. Naturally, you wonder if you’re about to buy two different things.
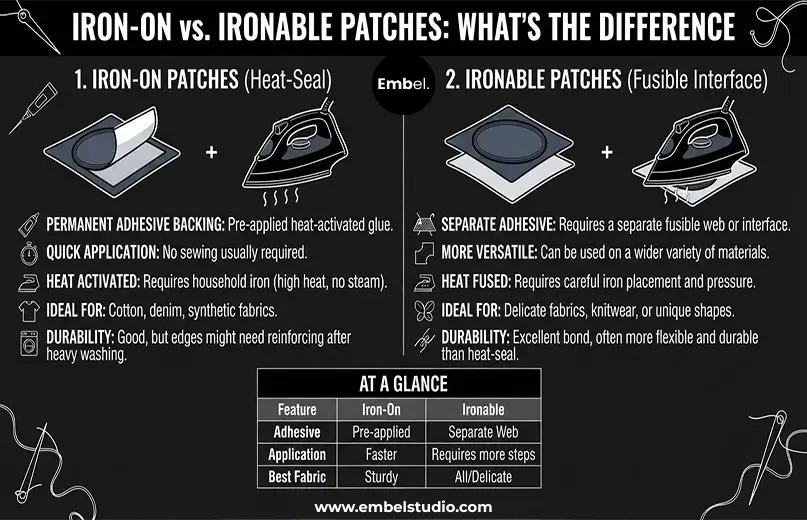
Here’s the quick answer: there is no real difference. Iron on and ironable patches are the same product. Both have a heat activated adhesive on the back that bonds the patch to fabric when you press it with an iron or heat press.
The confusion is understandable, though, because patches come in several attachment styles. Let’s clear it all up so you can pick the right one for your jacket, backpack, or team uniform.
Iron On vs Ironable: The Short Answer
Both terms describe a patch with a thin layer of thermoplastic glue on the back. When you apply heat and pressure, the glue melts, seeps into the fabric fibers, and hardens as it cools.
Why Two Names Exist
Iron on is the standard industry term. “Ironable” is simply another way people describe the same thing, and you’ll see it on some listings and in search queries. It’s a wording preference, not a different product.
What People Are Really Asking
When someone searches “iron on vs ironable patches,” they usually want to know one of three things:
- Do I need a special iron or tool?
- Will it stay on through the wash?
- Should I sew it instead?
We’ll answer all three below.
How Iron On Patches Work
Flip an iron on patch over and you’ll see a slightly shiny, textured backing. That’s the adhesive.
The Heat Activated Adhesive
The glue stays inactive at room temperature. Once it heats up, it softens and grips the fabric weave. As it cools, it locks in. That’s why letting the patch cool completely matters so much.
Temperature and Time
Most patches need the iron on the cotton setting (roughly 300 to 350°F) and about 30 to 45 seconds of firm, steady pressure. Always follow the instructions that come with your specific patches, since materials vary.
Iron On vs Other Patch Types
The real “difference” people often mean is between attachment methods, not between iron on and ironable. Here’s how they stack up.
| Type | How It Attaches | Best For | Permanence |
|---|---|---|---|
| Iron on / ironable | Heat activated glue | Cotton, denim, canvas | Medium to high |
| Sew on | Needle and thread | Any fabric, heavy use items | Very high |
| Peel and stick | Pressure sensitive adhesive | Temporary use, kids’ crafts | Low |
| Velcro (hook and loop) | Two piece backing | Uniforms, tactical gear | Removable |
Iron On vs Sew On
Sewing is the gold standard for durability. If a patch will face constant washing, friction, or outdoor abuse, stitching the edges (even after ironing) gives you extra insurance. Iron on is faster and easier, which is why most people start there.
Iron On vs Peel and Stick
Peel and stick patches use a sticker style adhesive. They’re fine for a costume or a one day event, but they rarely survive a wash cycle. Iron on patches bond far more securely.
Iron On vs Velcro
Velcro patches are great when you need to swap patches, like on work uniforms or bags. Iron on is a permanent choice, so it’s better for decoration and branding that stays put.
Which Fabrics Work Best
Iron on patches are not universal. The fabric matters more than most people expect.
Fabrics That Work Well
- Cotton and cotton blends
- Denim
- Canvas
- Twill and cotton poly uniforms
Fabrics to Avoid or Treat Carefully
- Nylon and other heat sensitive synthetics (the iron can melt or warp them)
- Waxed or waterproof coated fabrics
- Leather and faux leather
- Very stretchy materials like spandex
For those, sewing is the safer bet.
How to Apply an Iron On Patch (Step by Step)
You don’t need fancy equipment. A household iron and a flat, hard surface will do.
What You’ll Need
- Your iron on patch
- An iron (steam turned off)
- A thin cotton cloth or pressing cloth
- A hard, flat surface (an ironing board can be too soft, so a countertop with a towel works better)
Step 1: Prep the Fabric
Wash and dry the garment first, and skip fabric softener. Pre ironing the area removes wrinkles and gets the fabric warm.
Step 2: Position the Patch
Place the patch where you want it, adhesive side down.
Pro tip
Use a small piece of heat safe tape or just hold it in place with your fingertip (carefully) to keep it from sliding.
Step 3: Press Firmly
Cover the patch with your cloth, then press the iron down with real pressure. Don’t slide it around. Hold for 30 to 45 seconds.
Step 4: Flip and Press Again
Turn the garment inside out and press the back for another 20 to 30 seconds. This pushes the glue deeper into the fibers.
Common mistake
Lifting the patch before it cools. Give it a few minutes. If a corner peels up, just press it again.
Making Iron On Patches Last
A good application is only half the job. How you care for the garment matters too.
Wash Smart
- Wait at least 24 hours before the first wash
- Turn the item inside out
- Use cold water and a gentle cycle
- Air dry when you can, since high dryer heat can loosen the glue over time
Add a Few Stitches for Extra Security
Worn a hundred times on a backpack or work jacket? A few stitches around the edge can double the lifespan of an iron on patch. Plenty of people iron first, then sew.
Custom Iron On Patches from Embel Studio
If you want patches made for your brand, team, club, or event, custom is the way to go. At Embel Studio, you can create custom iron on patches designed around your artwork, so your logo or design looks clean and consistent on every piece.
Why Go Custom
- Brand consistency: Your logo, colors, and details stay exactly as you designed them.
- Team and group identity: Sports teams, schools, clubs, and troops can all wear the same look.
- Small business merch: Patches are a simple way to add a branded touch to hats, jackets, and tote bags.
- Personal projects: Gifts, keepsakes, and one of a kind jackets all benefit from a patch made just for you.
Ideas for Using Custom Iron On Patches
- Denim jackets and jeans
- Baseball caps and beanies
- Backpacks and tote bags
- Work uniforms and company apparel
- Event giveaways and promotional items
Ready to design yours? Explore custom iron on patches at Embel Studio and get started with your artwork.
Frequently Asked Questions
Are iron on and ironable patches the same thing?
Yes. They’re two names for the same product: a patch with heat activated adhesive on the back.
Do I need a heat press for iron on patches?
No. A regular household iron works fine. A heat press gives more even pressure, which helps when you’re applying many patches.
Will iron on patches survive the washing machine?
They can, if applied correctly and washed gently. Cold water, inside out, and air drying help. For heavy use items, sew the edges too.
Can I remove an iron on patch later?
Usually, yes. Heat the patch again to soften the glue, then carefully peel it off. Some residue may remain and can often be cleaned with a bit of adhesive remover.
Can I put an iron on patch on a hat?
Yes, but the curved shape makes it trickier. Use a small, rounded surface (like a rolled towel) inside the hat for support, and press in sections.
Final Thoughts
So, iron on vs ironable patches? Same thing, different label. What matters more is choosing the right attachment method for your fabric and how long you want the patch to last. Iron-on is quick, affordable, and beginner-friendly, and adding a few stitches makes it nearly bulletproof.
Whether it’s a single custom design or a batch for your whole team, Embel Studio can help you turn your idea into a patch worth wearing.





Leave a Comment